Week four of the One Room Challenge means we’re halfway to the reveal and there’s still so much more to do! And much to my husband’s dismay I keep coming up with more ideas to add to the project list. I’m always budget conscious though, which he appreciates. Thanks to my initial sticker shock and hesitancy spending a small fortune on an area rug, a sale eventually came around for the long weekend and I was able to score a couple of rugs options for the living room for less than the original price of just one rug! Now I just have to hope and pray they arrive in time.
Picking a Wall Colour
When we first moved in to this house we only painted 3 rooms: the upstairs bathroom went light blue to pair with our floral shower curtain and cover up the pink that was there previously, the living room became a watery peanut butter colour to match the beige couches we had, and the paneling in the flex space got a couple coats of purple because that’s my favourite colour. I’m not proud of any of those colour choices now. I feel Ive come a long way in my personal style and I’ve learned so much about putting a space together.
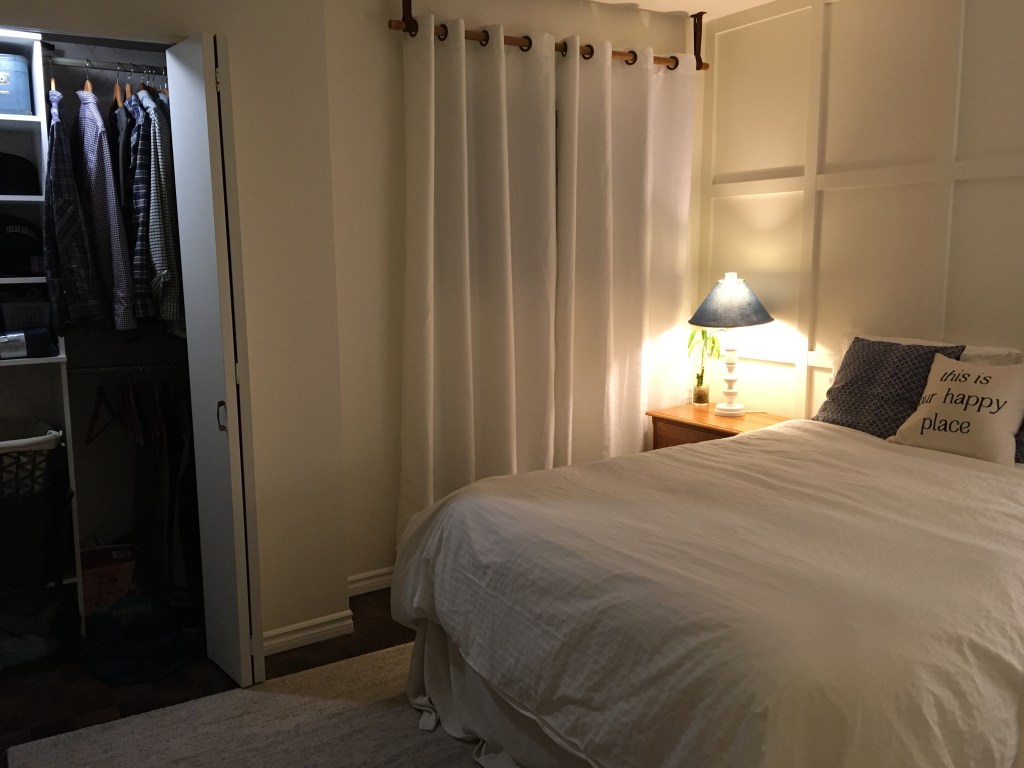
Maybe it’s because I don’t have a great track record with picking paint colours but I now like to play it a bit safe. I know it may be kind of boring, I love a nice white room. The Budget Room Refresh in our primary bedroom made me fall in love with the feeling of calm that washes over me when I enter a space that is free of clutter and is fresh, bright and white. Honestly, when I walk into my bedroom I feel tension release from my shoulders and I feel at peace. I think it’s partly because I know how the room used to make me feel at the end of a long day. Now that we’ve decluttered and downsized to one shared dresser, we have space to move and breathe and everything has a place. This room used to feel so crammed. Minimizing our wardrobe and maximizing the closet space helped a lot with that.
Anyway, since then I’ve found that white walls as a base for a room can be the perfect versatile canvas for pops of colour to shine. Lately, every room we’ve done has been painted white; we used Ivory Palace by Behr in our primary bedroom, and Whisper White by Behr in the boys’ room, nursery, and bathroom. All of those rooms have then incorporated a navy blue accent. I haven’t quite decided what the accents will be in the living room as I’m hoping the rug I chose for the space will give me some direction in that regard.
In the past I always went with Behr paint because it was convenient to pick up while getting other supplies at Home Depot. What with the pandemic restrictions and curbside pickup delaying things I figured I would give Sherwin Williams a try. Full disclosure, a friend of mine works for them and has been trying to sell me on the quality of their products for some time. He gave us some tips and product recommendations and sent me a free colour deck but we did pay for the paint ourselves. No sponsorships over here. (I wish!)

I did some research about the different Sherwin Williams whites to see what the professional interior designers had to say about them. Out of the top white recommendations, I found Alabaster and Greek Villa were the ones I was drawn to most. I know you should typically buy samples and swatch them in your space to see them in the different lighting in your space but 1. I’m impatient, 2. we’re on a timeline, 3. there’s all sorts of light coming into this room through windows and doorways so a swatch on one wall would look totally diffferent on another anyway.
I picked Alabaster and we went all-in on a 5 gallon tub of it in the SuperPaint line with a satin finish. It was ready for pickup in 30 minutes. Since it was paid for with our credit card over the phone, all I had to do was drive up, call to let them know I was outside and they put the paint and receipt in my trunk. So refreshing considering I had to wait 5 days for my Home Depot order to be ready for pickup and had to wait at least 30 minutes in the parking lot on a hot day to get it.

Prepping for Paint
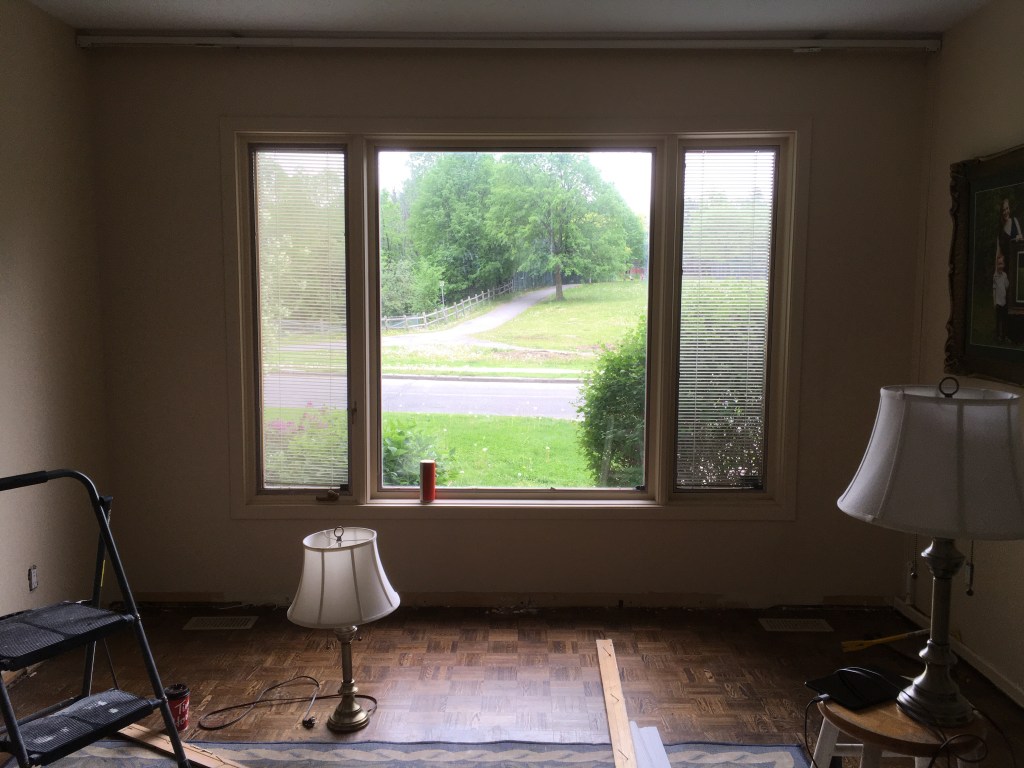
I’m always optimistic and think that we’ll be able to paint a whole room in one day but that’s never quite how it turns out. Even though we’ve done this many times before, I always underestimate how long the prep work takes. We moved the furniture from the living room into the dining room the night before painting day. Since we have a great paint kit now with all the painting supplies we’ve inherited and accumulated over the years, I thought we’d be able to hop to it early Saturday morning. We had even arranged for childcare for the kids so we could maximize our day.
Well, I was so excited I couldn’t sleep the night before and wound up sleeping in extra late since Dan knew baby and I needed rest. Once we finally got started in the living room we realized there was more that needed to be done than just taking the curtains and art down and removing the outlet covers. Daniel wanted to touch up the drywall on the arch and other entry which required more sanding and mudding and then drying and more sanding. We also decided to remove the old baseboards, so that took some time and a little vacuuming.
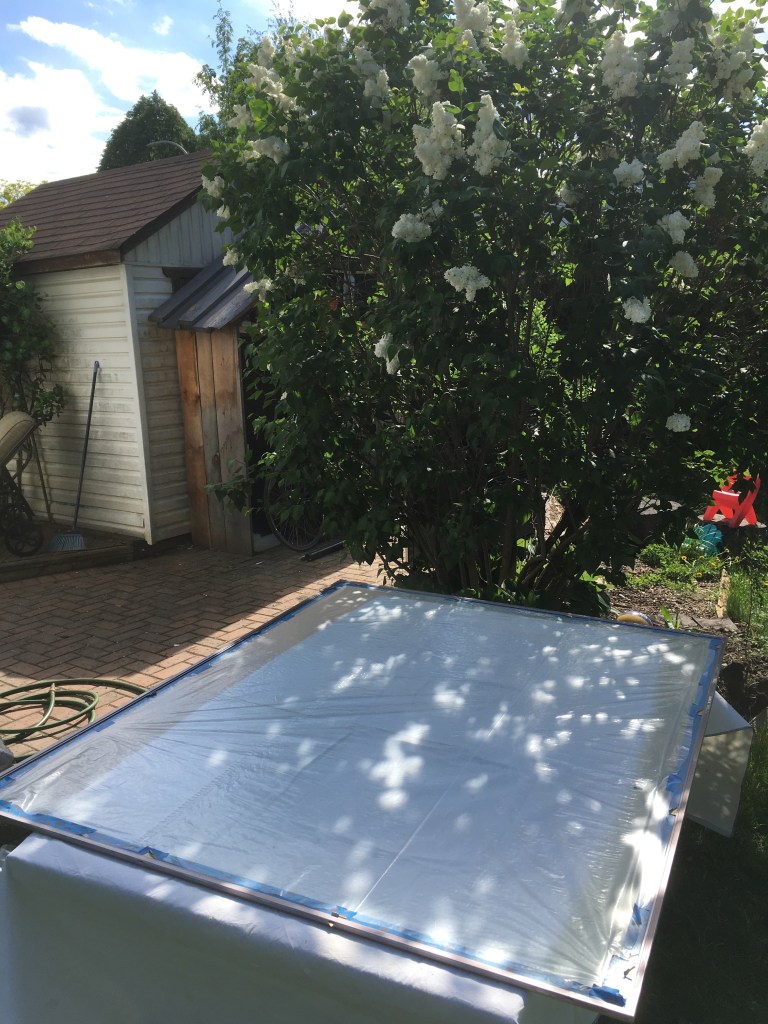
Then there were also the windows that have a removeable pane to access the built-in blinds. I wanted to finally remove those to maximize the light into the room. Since the windows were already out I figured I’d take this opportunity to spray paint the metal frames black. Taping off and covering with protective plastic was pretty time consuming but so worth it.
We’re Rolling
Thankfully, my sister came to help us out and she and Dan were able to get the first coat on the living room, front entry and side entry hallways pretty quick.
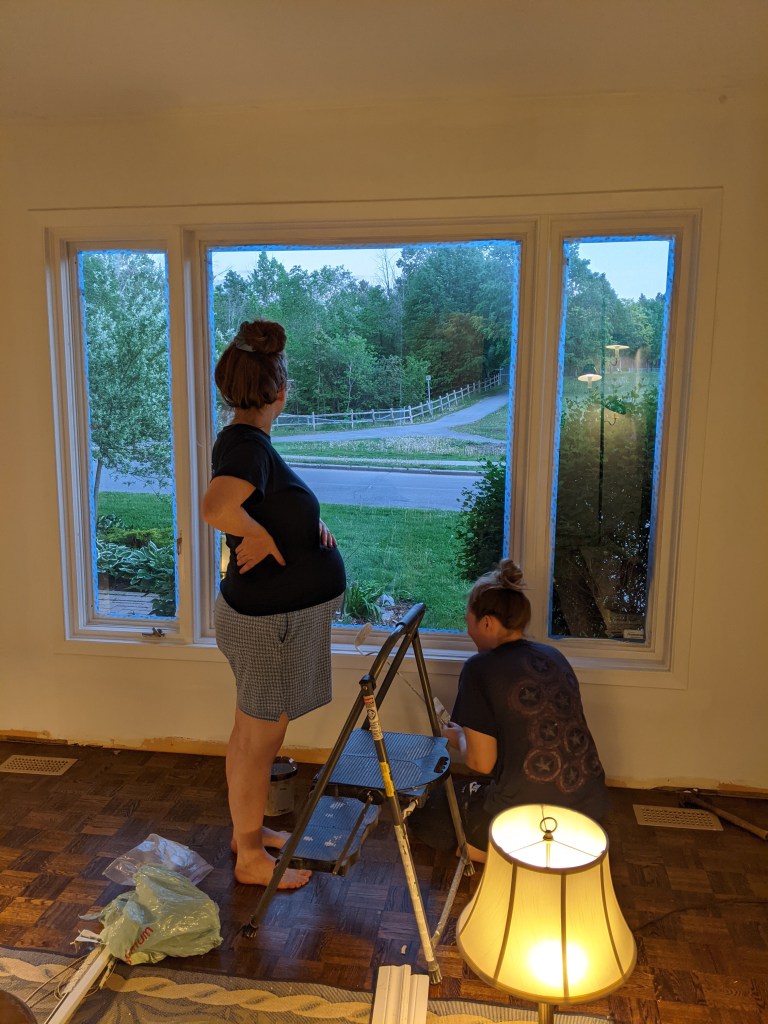
While they rolled, I spray painted the windows outside. I’m proud to say I didn’t go too heavy with the spray paint this time; I finally learned to do a few light coats instead of one heavy drippy one.
Unfortunately the drywall still needed to dry in some spots so the painting party had to carry over into Day 2 which did not have extra hands for childcare. Thankfully the older kids (Henry 5 and Freddy 3) understood the temporary limitations of the whole main floor and played outside or in the playroom and napped well in their rooms allowing us to finish up what we started. The little one however, (Ginny 1.5) wanted to help and got paint all over her pjs right before bed. She’ll definitely be a DIYer too!

Dan did his best rolling the paint onto the brick but I decided I wanted the mortar to match so I did that into the wee hours.

Day 3 of our long weekend painting party was pretty breezy. Dan installed the baseboards we had leftover in the basement. We didn’t have enough for the whole room so that’s another item added to the shopping list and task on the project list. We put the windows, now with black metal frames, back in and returned the furniture from the dining room.

It may not look like much now, but this is a big step in the right direction! Lots more to come…
THE PROJECT LIST:
DeclutterWiden entrywaysDrywallPrimePaint wallsPaint brick fireplacePaint window frames- Install and paint baseboards
Prep fireplace mantel- Install fireplace mantel
- Music storage/station
- Firewood storage
- Replace rug
- Figure out lighting
- DIY Art
- Stage with art and accessories
Only 4 weeks left! Will we make it? I’ll be back next week with another blog update. Until then, follow along in stories on Instagram or Facebook to watch our progress.
Cheers,
Lydia

Visit each week of my One Room Challenge™ here:
Week 1 | Week 2 | Week 3 | Week 4 | Week 5 | Week 6 | Week 7 | Week 8 |
Thanks for being here! See what everyone else in this challenge is up to at One Room Challenge™.

Not even 2 yet, and Ginny’s already a bad-ass! Love it!!!! (Oh… and the room is coming along nicely too.) 😉
LikeLike