We’re in the thick of the One Room Challenge now! You can see my design plan from Week 1 and my mini demo in Week 2 if you missed it. Unfortunately I didn’t get as much done this week as I had hoped (as usual) since my online order from the hardware store was significantly delayed. Here’s what I did get to do.
This post contains affiliate links. For more information please see my disclosures here.
Faucet
One thing I was able to do while waiting for my items was tackle the faucet refresh. When I bought the bathroom light fixture secondhand, the seller included several other bathroom items including a brushed bronze faucet that was missing the lift rod for the drain stopper.
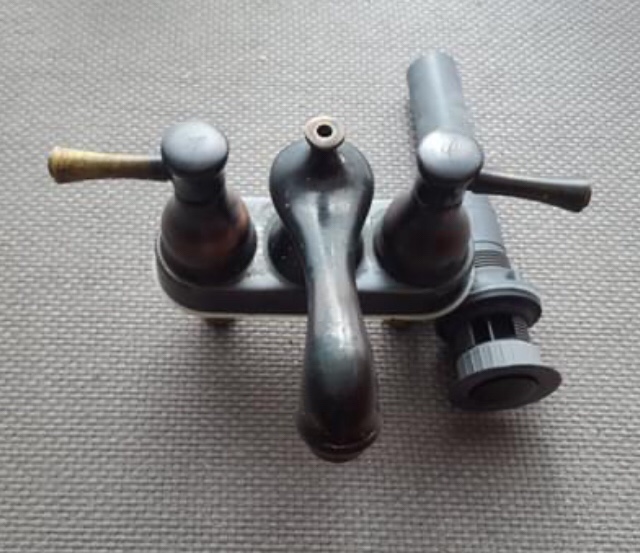
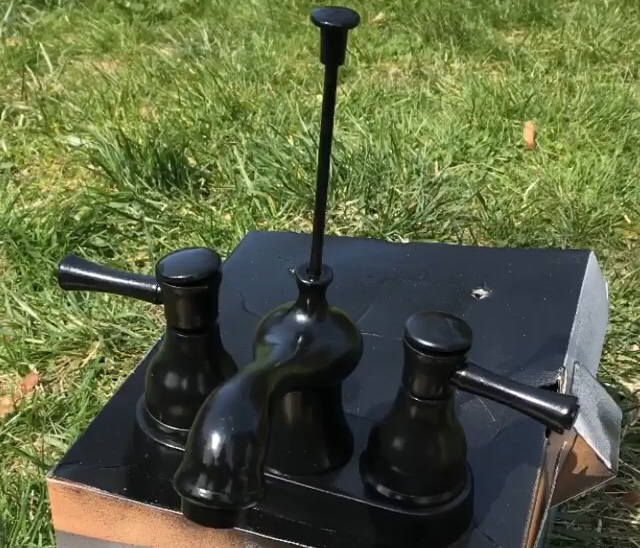
I was planning on spray painting my existing faucet anyway so I figured, why not try on this free one first? I used Rustoleum Painter’s Touch 2X spray paint in Semi-Gloss Black.

I tried my best to keep my coats thin and even but went a little heavy on the handles. Thankfully I could just sand them down and try again. The second attempt worked much better and even though there are a few imperfections they are not super noticeable unless you really examine the faucet. I also took the lift rod from another faucet in our house, (that will soon be replaced) and sprayed it black too. I can’t wait to see it installed and see if it holds up!
Shelves
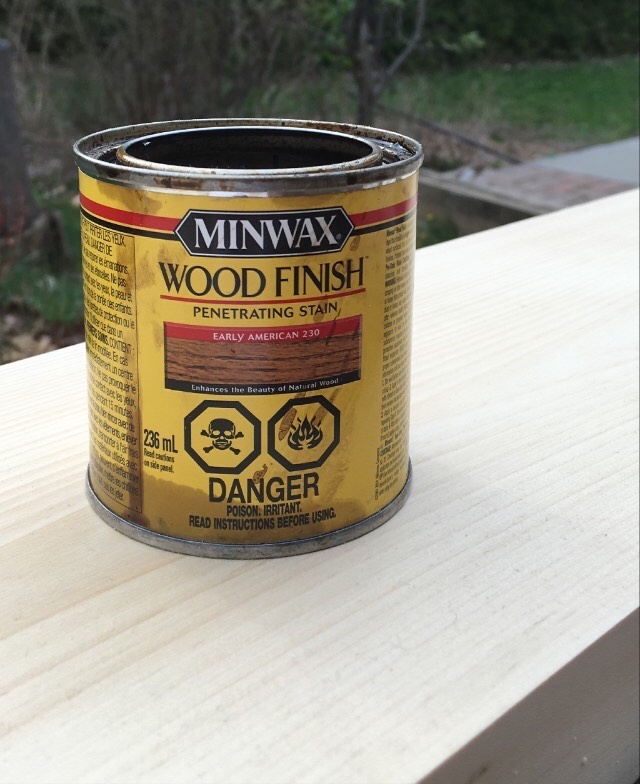
Another thing I started while waiting for my supplies was making the floating shelves. A dear friend of ours works at a local lumber mill and he personally milled some 2″x8″x8′ pine boards for me. We measured and cut them down to size, sanded, and stained them in Minwax Early American stain.
They still need a topcoat but I got distracted when I saw the overdue confirmation email that my order was finally ready for pickup!
Once I got my hands on those supplies, my carefully planned sequence of events could commence!
Lighting
After picking up the goods from the hardware store the first order of business was moving the light fixture up to accommodate the secondhand mirror I want above the vanity. We could have done that part earlier, but we didn’t want to reinstall the light before patching the drywall and painting.

We had to wait for the drywall compound before we could do that but now the old fixture hole and all other wall imperfections have been filled and sanded down. All ready for paint! But paint had to wait until the next task would be complete. Knowing what was to come, it made sense to keep the light off the wall for protection.
Epoxy
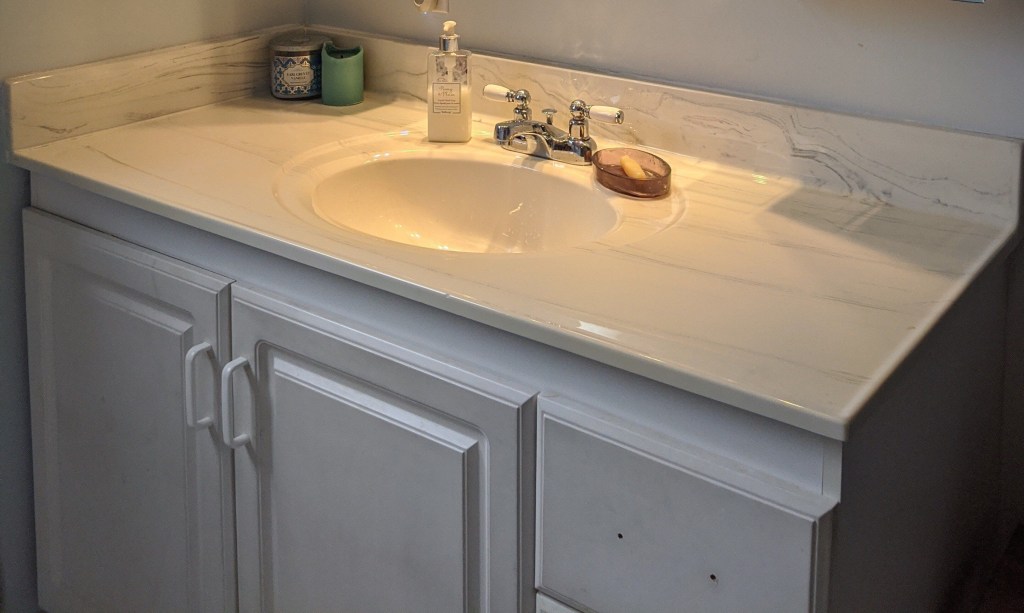
The vanity counter top and tub surround had seen better days. The marbled look wasn’t too bad but the yellow undertone simply had to go.
I had seen Rustoleum Tub & Tile Epoxy used to refinish all sorts of surfaces. After watching a ton of tutorials and reviews on Instagram Stories and YouTube I decided I would try my hand at it. This has been one of the most challenging DIYs I’ve attempted. It seems simple in theory but in practice it is quite tricky.
First, there’s the prep. That took so long! We removed all of the fixtures and all of the caulking around the counter top and tub surround. Then I had to clean up alllll of the little silicone shavings. I swept, vacuumed, and wiped with a tack cloth over and over and over. I also used a Goo-Buster cleaner spray to make sure there was no residue of soap scum, mildew or other gunk on the surfaces. That stuff alone was potent and required gloves, a ventilation mask and eye protection to apply.

While waiting for the degreaser to completely dry, we spent what felt like forever taping around the surfaces and putting protective plastic up because I had been warned by many tutorials about the overspray.
Finally at 11:02PM it was time for the transformation to begin. Why start so late? Because I was also warned about the smell and how overwhelming the fumes would be. We decided to have the family camp outside in the backyard to avoid the fumes. Since they were already sleeping out there I had to get it done! Since you have to wait 2-6 hours between coats I figured the sooner I start the better. Plus it takes at least 2 whole days to fully cure so no time to waste!
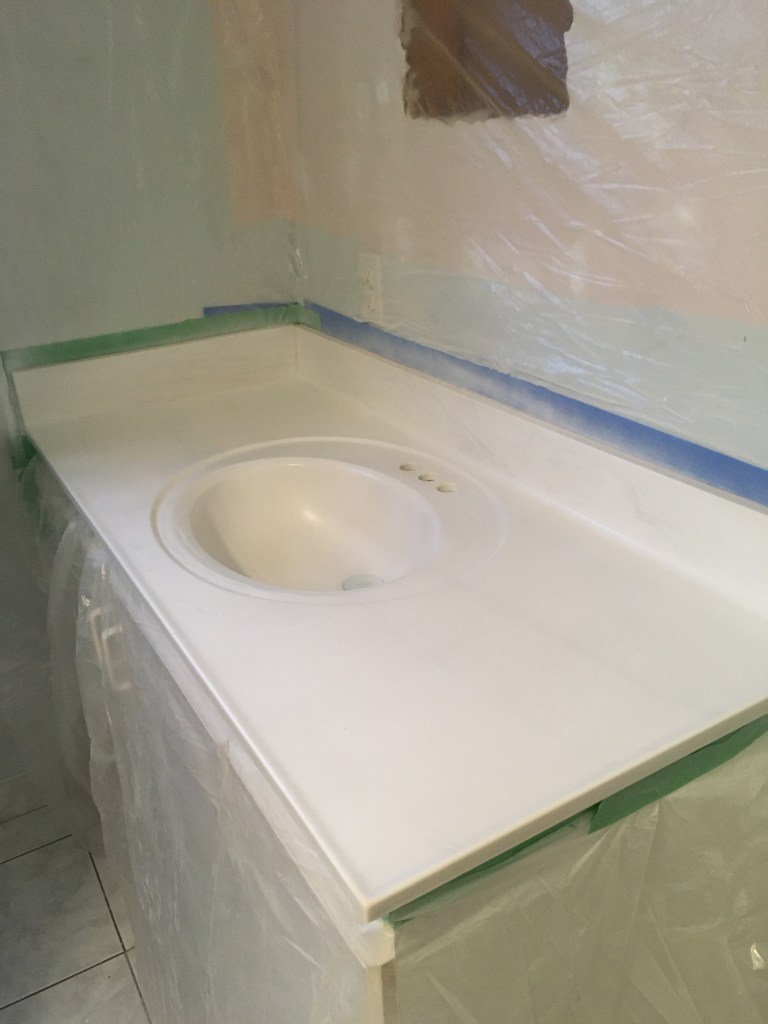
Vanity Counter Top and Sink
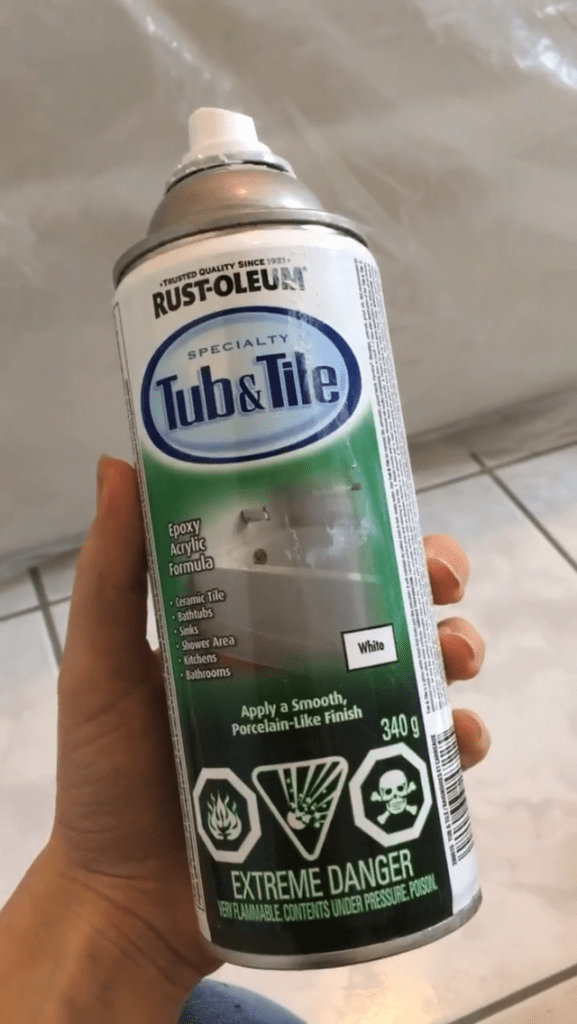
One reviewer described the Rustoleum Tub & Tile Spray as a “miracle-in-a-can” and I could see from the beginning that it was an impressive product when the application went smoothly.
However, the spray flow was inconsistent and even though I was trying to do light even coats the spray would surprise me and pool in places. Then I would panic and spray more to try to even it out but then bubbles would appear. I shouldn’t have but I couldn’t resist, I touched it in an attempt to free the air bubbles and smooth it out but that would just make it worse!
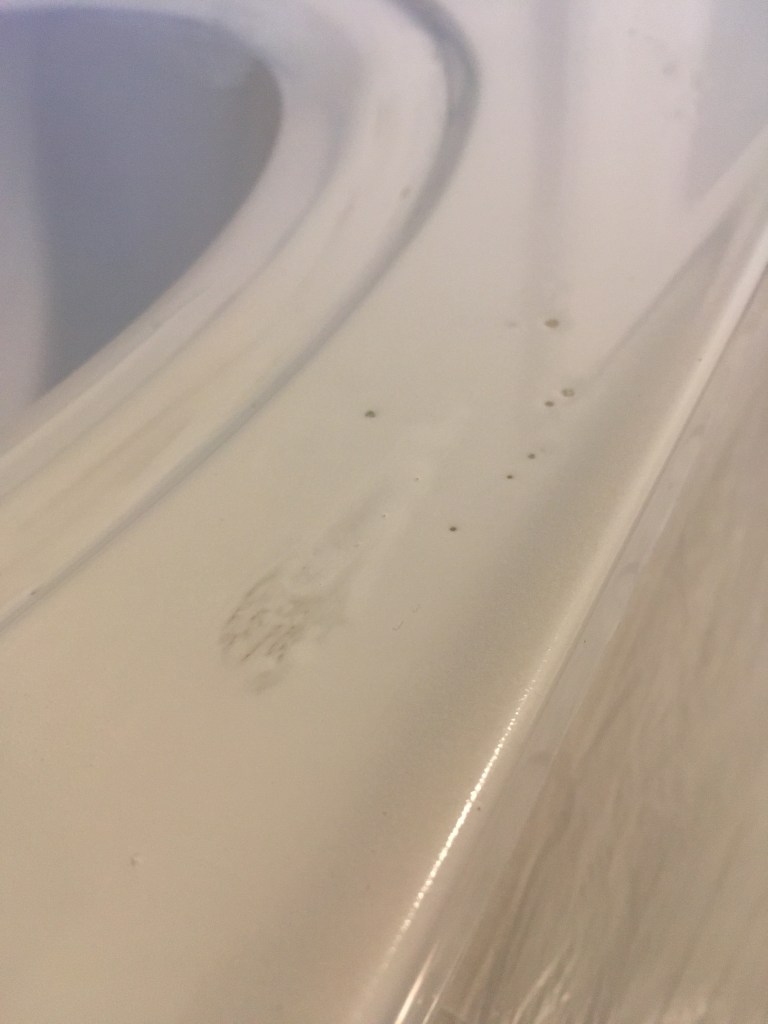
I had to accept the imperfections in those spots and call it a night. I let that first almost full can’s worth of product set overnight.
The next morning I sanded the bubbles and rough spots down and went for round 2. Most of it looked great but in the lip of the sink there was pooling and I panicked again and touched it messing it up even more. Will I ever learn?
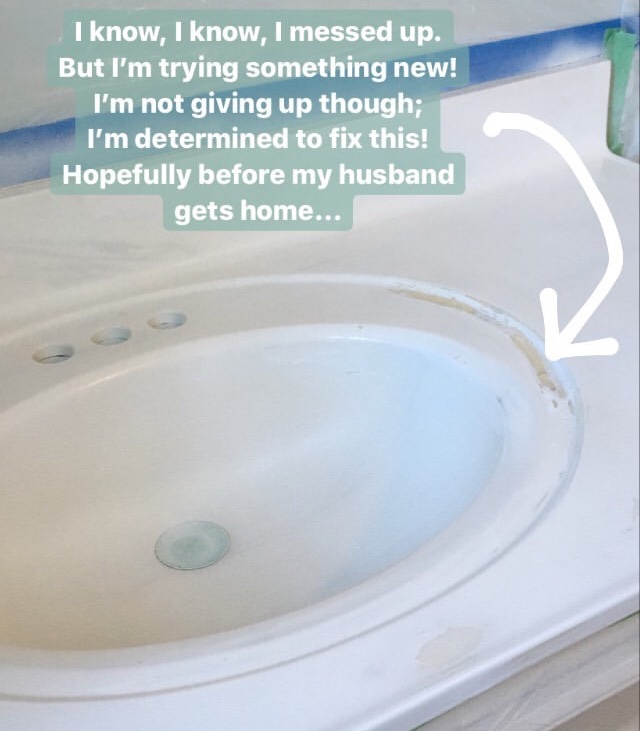
I walked away, let it dry and sanded again. Third time’s the charm right? Sort of. I got the counter top to look pretty even but there were now drip lines on the right side of the sink! A few more hours of dry time, sanding and another pass over helped a bit but the streaks are still apparent.
I realized after that the right side of the sink is worse because I’m right handed. It was easier to control the spray pointed towards the left of the sink but harder for me to get a good angle of the right side with my right hand no matter where I positioned myself.
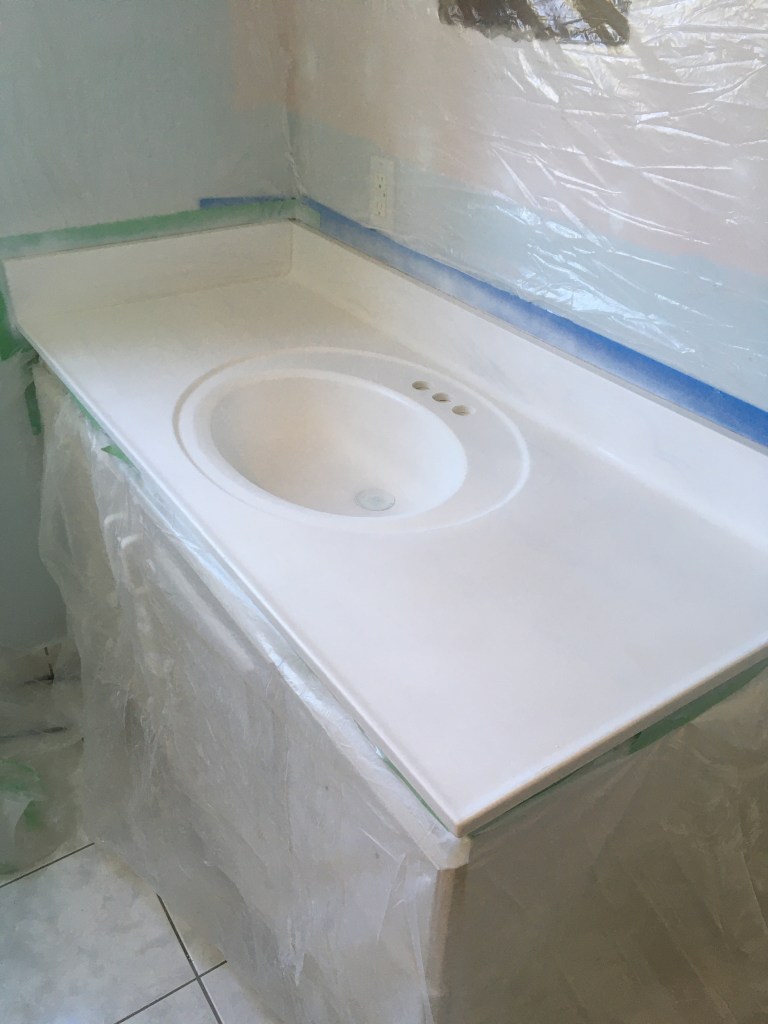
Overall I’m happy with the product even though my technique was flawed and application was imperfect. You can still see the marbling effect a bit which I actually kind of like. I’m glad I gave this a try before replacing the vanity top completely. I’m curious to see how it will hold up over time…
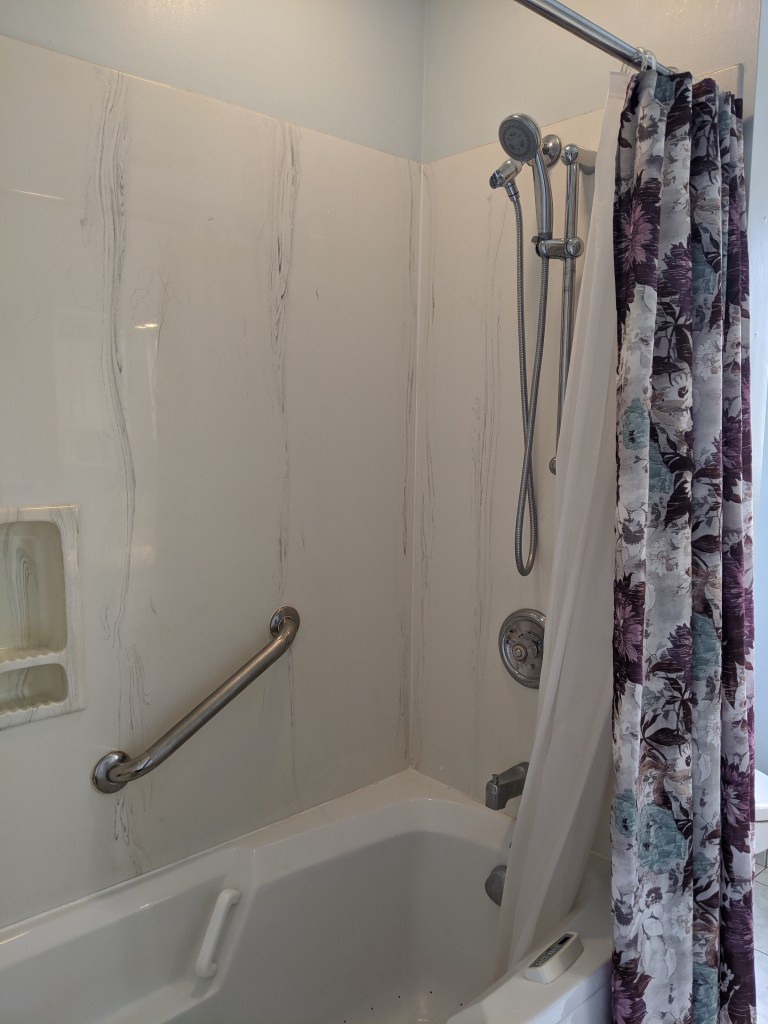
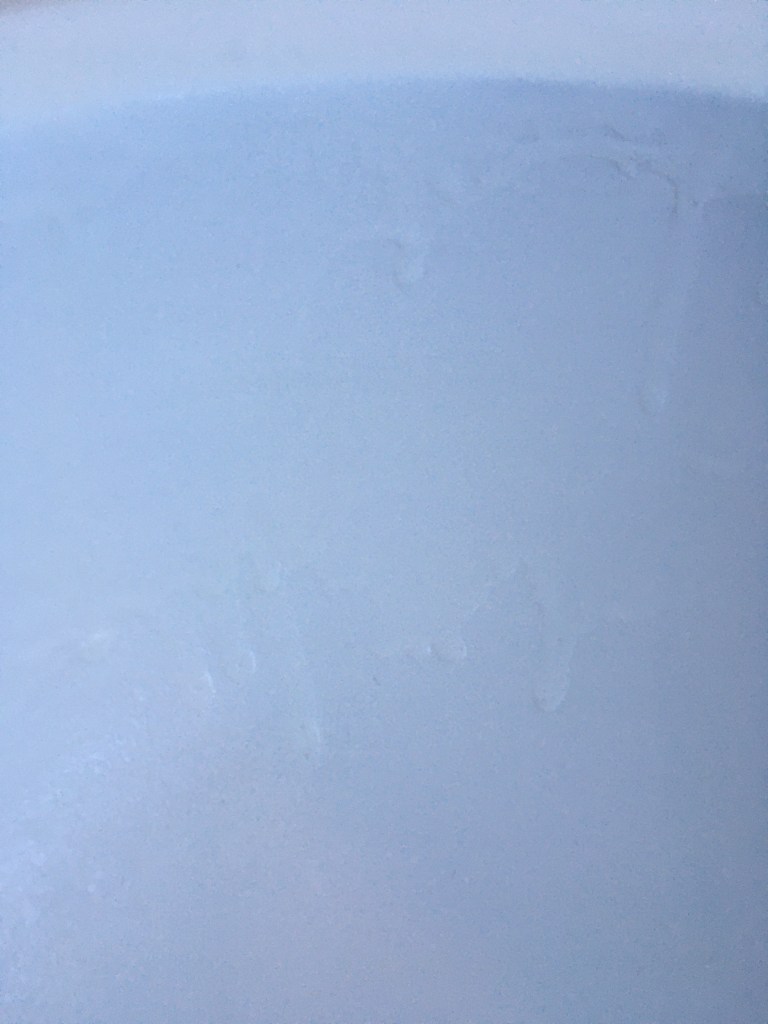
Tub Surround
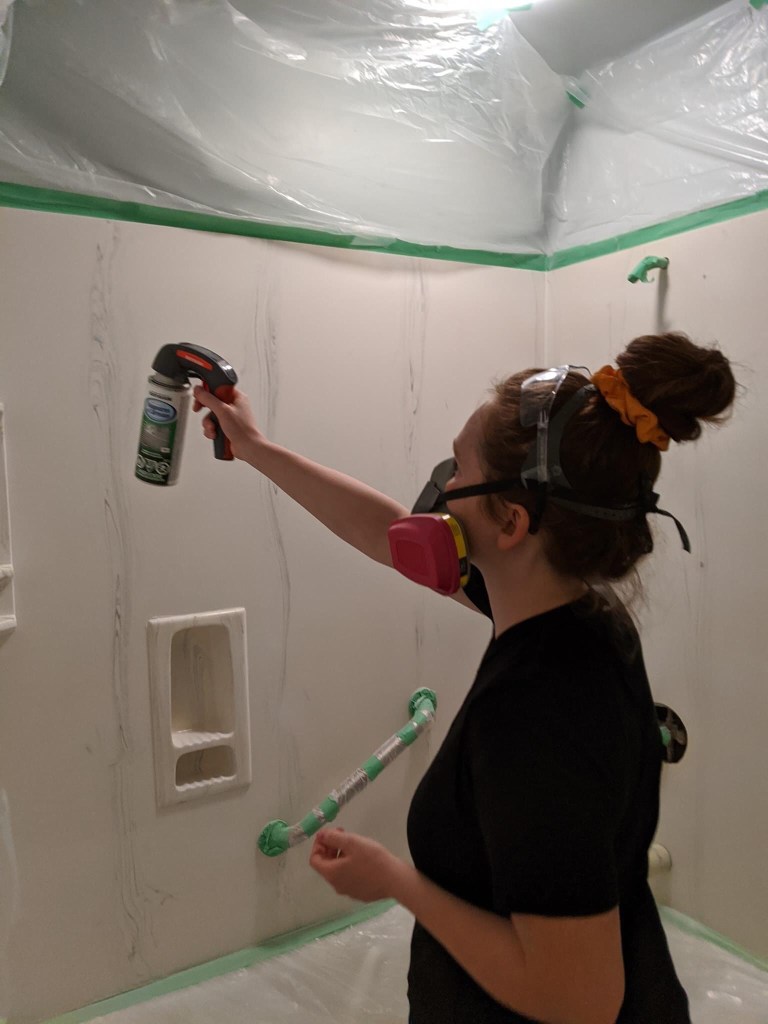
The tub surround went on a very different epoxy journey. I started with the same Rustoleum Tub & Tile Spray at first but quickly learned that the inconsistent spray lends itself easily to drip lines. It might not be the product, it could totally be the user. I used a Rustoleum Comfort Grip attachment to help with the angle and pressure to avoid my finger cramping but I knew that wouldn’t guarantee a smooth application.
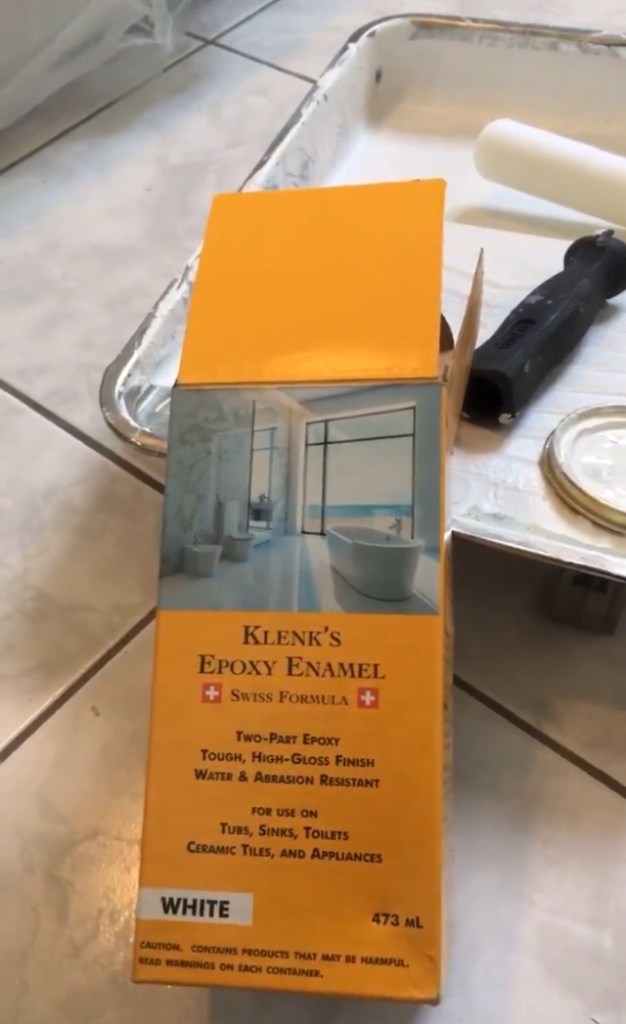
After one quick thin pass over of the tub surround with the spray I knew I would be moving on to the roll on alternative. There is a Rustoleum Tub & Tile kit that comes in paint cans but my sister had given me a similar product from a different company. She had picked up Klenk’s Epoxy Enamel for her own tub surround but then decided to replace the surround completely. Since she had no use for the epoxy anymore and completely replacing the surround isn’t in my $500 budget she gifted me with the Canadian made, Swiss Formula epoxy paint kit.
It mixed up nicely. I let it stand for the required hour to allow the chemical reaction to fully happen before rolling it on. My reach was limited and the first coat was streaky but I had plenty left for a second coat. After letting that dry for a few hours I tagged Dan in since he has longer arms that could easily roll all the way from the top to the bottom of each panel.
He did what he could with the paint we had but we needed more to finish the job evenly. I knew this might happen as most of the videos I saw of those going through the same process needed 2 kits as well. he went out to grab more at the hardware store and called me to tell me my options. A Rustoleum kit was going to cost around $60 CDN! That would take quite a chunk out of my budget and we didn’t need THAT much to finish the job. Then he told me the spray version cost $28 CDN at that particular store (more than what I had paid before elsewhere)! He was optimistic about Rustoleum Appliance Epoxy as it seemed like a similar product but only $11 CDN! I was hesitant to switch products at this point anyway; what if the colour is a bit off and it’s a different white?! But since this is all a big experiment anyway, I figured what the heck. let’s give it a shot!
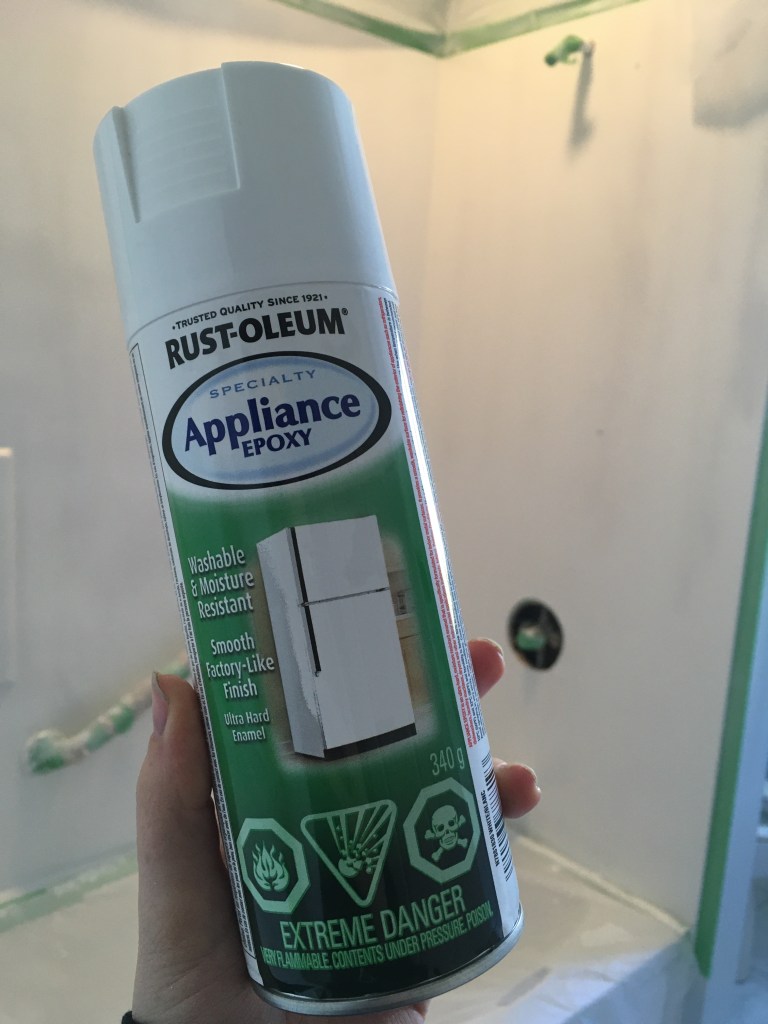
Dan sprayed 2 coats of the Appliance Epoxy and it looks pretty good for what it is. It’s a little splotchy and I do think another coat of the roll on stuff would have been better but since it will be hidden by a shower curtain anyway, I’m fine with leaving it as is.
Before you say, “BUT IT’S NOT MEANT FOR SHOWERS!” We know. We’ll see if this holds up over time. We can always replace the tub surround down the road if it turns out to be a disaster. That’s why I wasn’t too concerned about taking the risk. Refinishing the existing surround was always an experiment in my mind.

Now we have to let all of the newly refinished surfaces cure for a few days before we caulk. And we have a lot of cleaning to do since the overspray did get everywhere. That’s why I wanted to get that messy job out of the way first. Now we can move on to more fun stuff!
So here’s where the project list stands right now.
THE PROJECT LIST:
DeclutterRemove medicine cabinet and mirror- Remove tile baseboards (?)
Move light fixture boxPatch drywall holesSpray paint the faucet- Spray paint the window (?)
- Paint the walls and ceiling
- Paint tile floors with DIY Stencil
- Install and paint new baseboards
- Mount round mirror (with shelf?)
Install new light fixtureEpoxy countertopEpoxy tub surround- Install spray painted faucet
- Paint vanity (update cabinet faces?)
- Spray paint and rehang shower curtain rod
Build and stain floating shelves- Install floating shelves
- New shower curtain
- New towels
- Add art and accessories
So that’s all I have to report for now and there will be much more to come! I’ve been sharing as much as I can about the process for each project on Instagram and Facebook stories! Follow along over there if you want to see my latest misadventures in DIY!
Cheers,
Lydia
Visit each week of the One Room Challenge™ Here:
Week 1 | Week 2 | Week 3 | Week 4 | Week 5 | Week 6 | Week 7 | Week 8 |
Thanks for being here! See what everyone else in this challenge is up to at One Room Challenge™.

Please visit ONEROOMCHALLENGE.COM to view all participating Featured Designers and Guest Participants.

I’ve always been curious about that epoxy spray… but I’ve never been daring enough to try it on anything. I am very curious — after all is said and done — what you think of the final result. And I’m also curious to see — once you’ve used the bathroom for a while — how it stands up to daily wear-and-tear. Fingers crossed that the final look is what you hoped for.
LikeLiked by 1 person
I was so curious about all of the above too so I figured I would go for it and give it a shot. I’ll be sure to post an update after we’ve lived with it for a little while, Shena.
LikeLike