After nearly 5 years in our house we’re finally making an effort to make it more our own. You can read all about that in my post about making our house a home. I set SMART goals for 2020 in regards to the house and established a plan to go room by room and undertake a Budget Room Refresh.
January has been spent recovering from the holidays and getting the house back in order in general. So even though I haven’t started a Budget Room Refresh yet for 2020 I still feel like I’m on track to accomplishing my goals. My husband and I have been discussing the wish lists for the rooms we want to tackle next and I’ve been brainstorming how best to accomplish as much as possible with our limited budget of $500 per room.
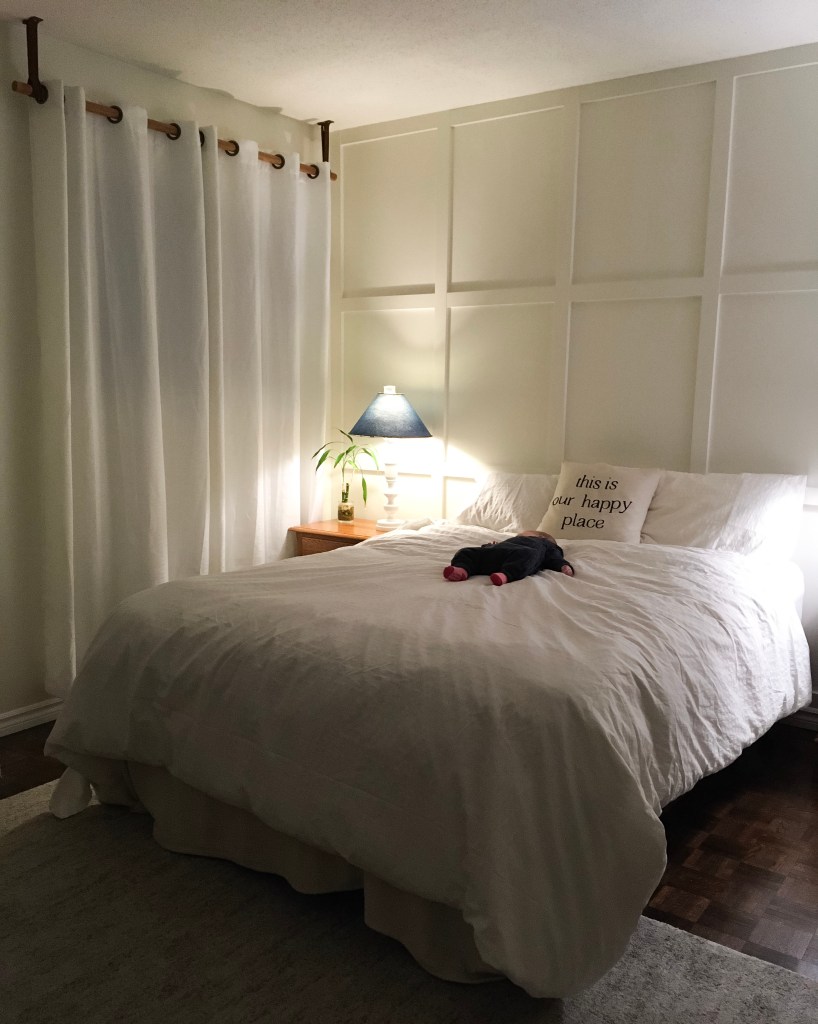
Master Bedroom
In November I embarked on the first Budget Room Refresh in the house and I finally have had some time to share the projects that involved. So now here’s an overview of everything that went into making our Master Bedroom our new retreat! The only thing we had done to this room before I started the refresh was stain the parquet floors before we moved in years ago. Everything else had remained untouched and the stuff was piling up…
Decluttering
The first step of any room refresh should be to get rid of what you don’t need. I used the KonMari method by going through the categories Marie Kondo outlines one at a time. First clothes, then books, papers, miscellaneous and mementos last. This part didn’t take long since I was focusing on the one room. There weren’t many books or papers in our bedroom so those went rather quickly. I was even able to convince my husband to declutter his wardrobe too. If you need some ideas on how to get your husband to do the same I wrote up some tips for you: How To Get Your husband to Declutter His Closet
Editing
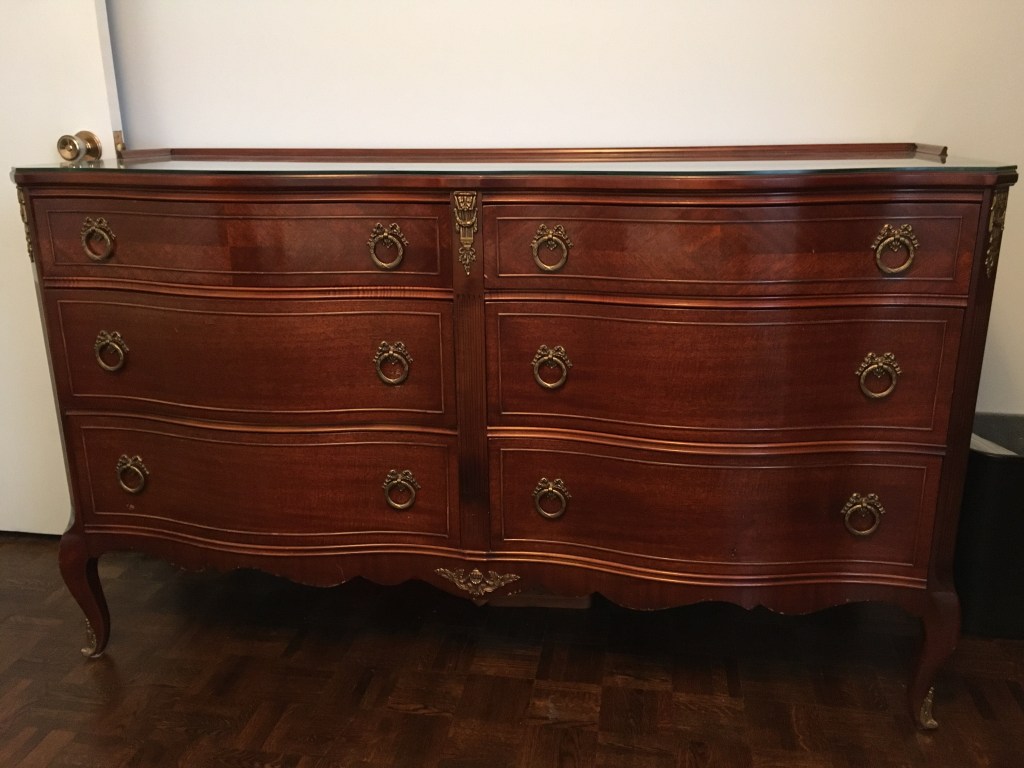
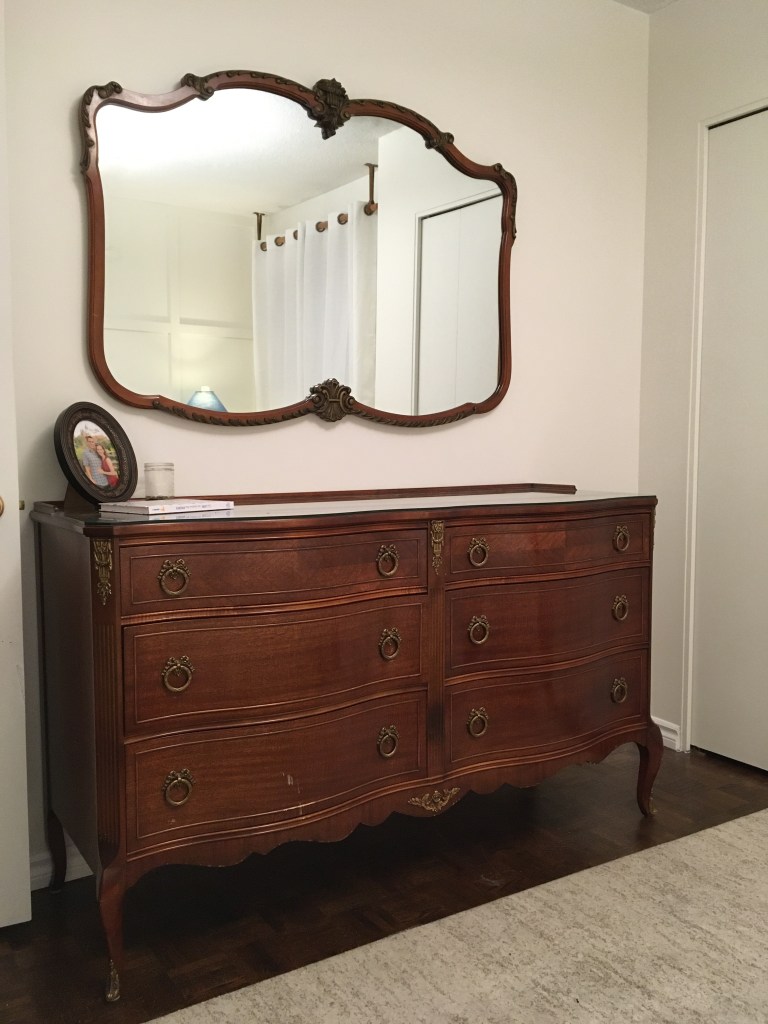
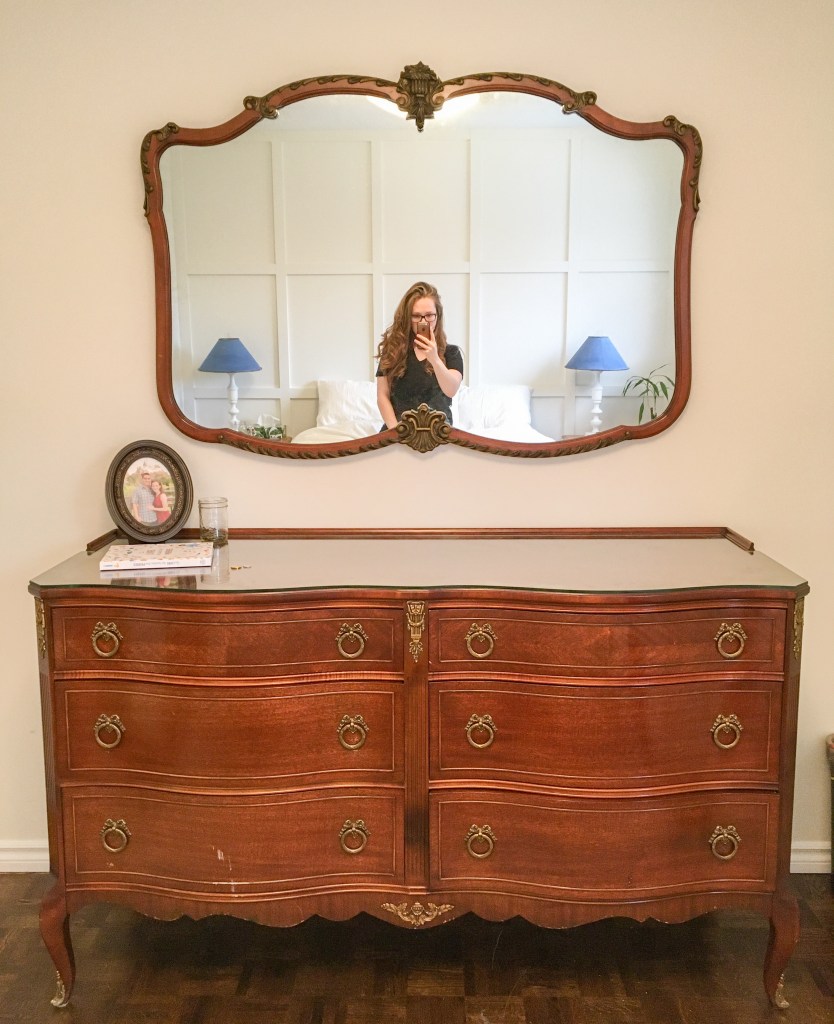
We had two dressers in the small bedroom and it made the room feel cramped. I knew I wanted to get rid of one but since they were all part of a matching set I decided to sell them all together. I listed the pieces on Facebook Marketplace and they were gone within a day!
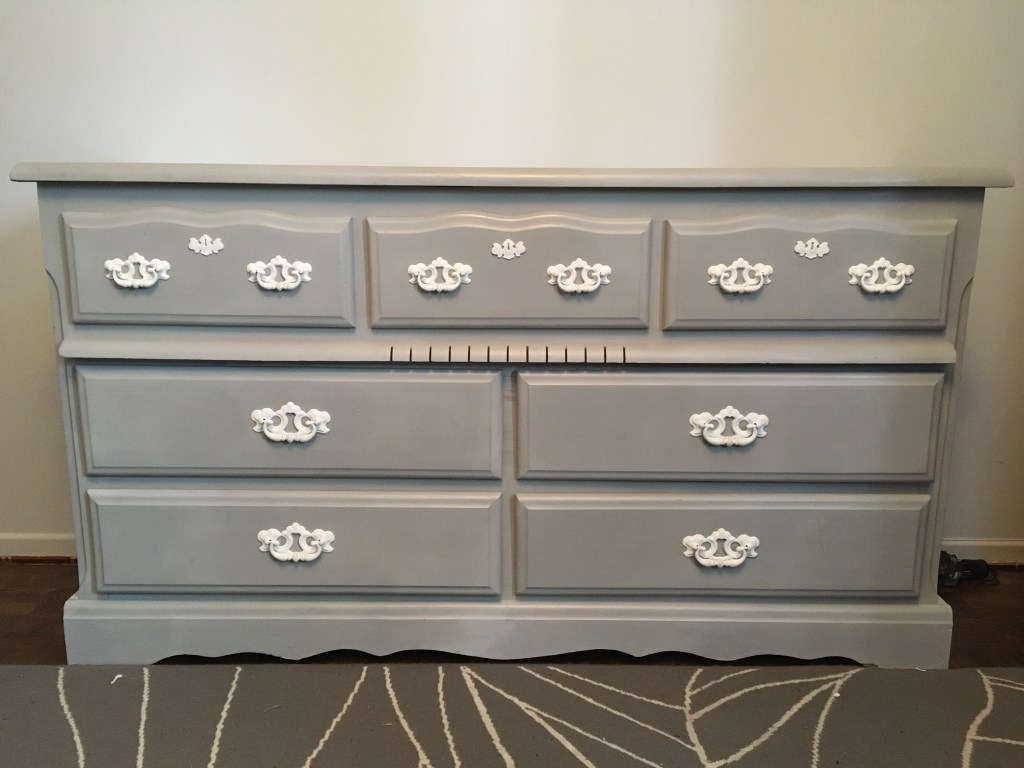
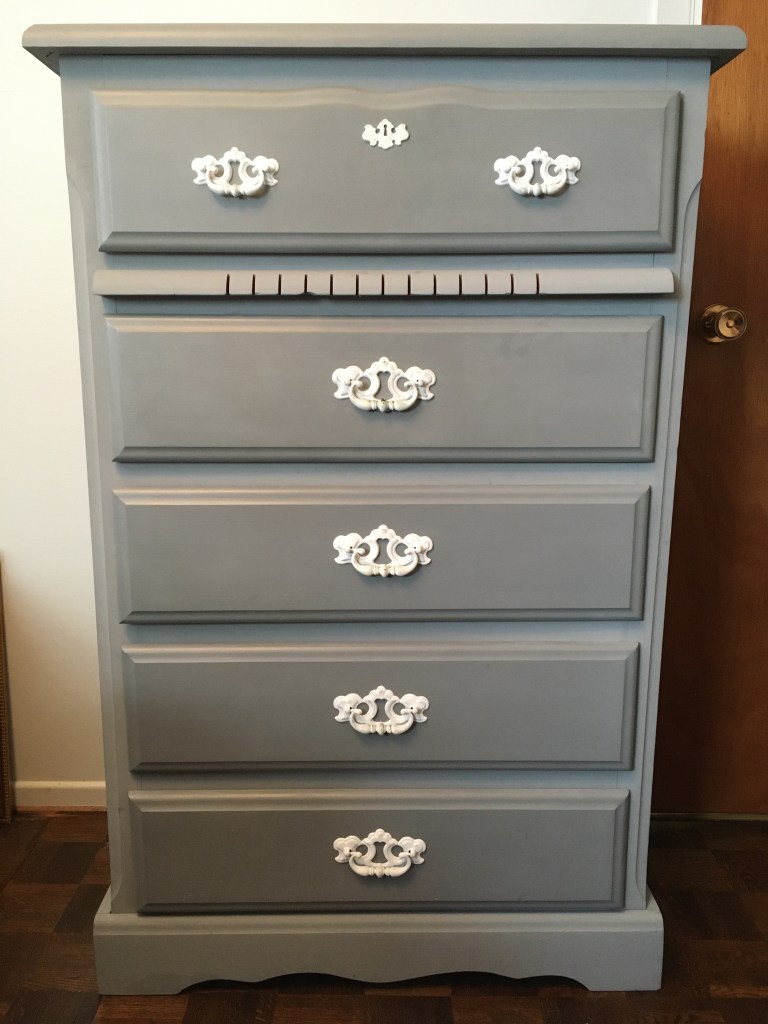
We then moved a dresser my grandmother had given me into the room. Now we share that one dresser; 3 drawers each.
Painting
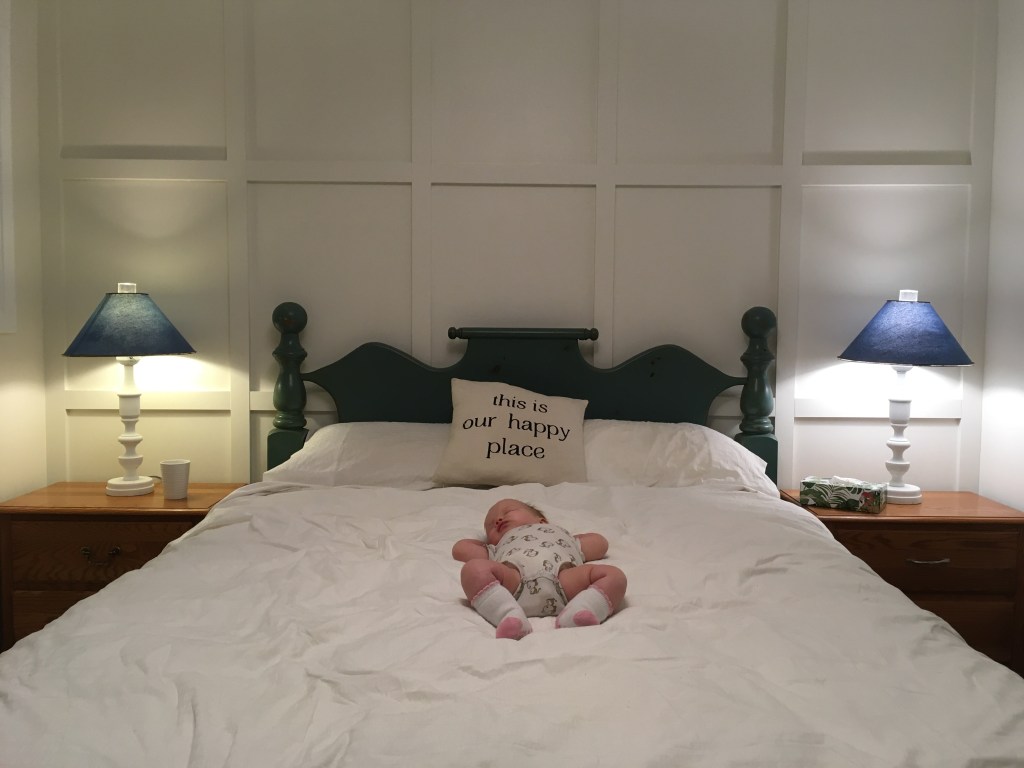
I knew I wanted the room to feel bright and airy so I decided to go with white. It was such a challenge to pick the right white though! Originally I thought I was going to have a green accent wall but my husband convinced me that the room was too small to pull that off.
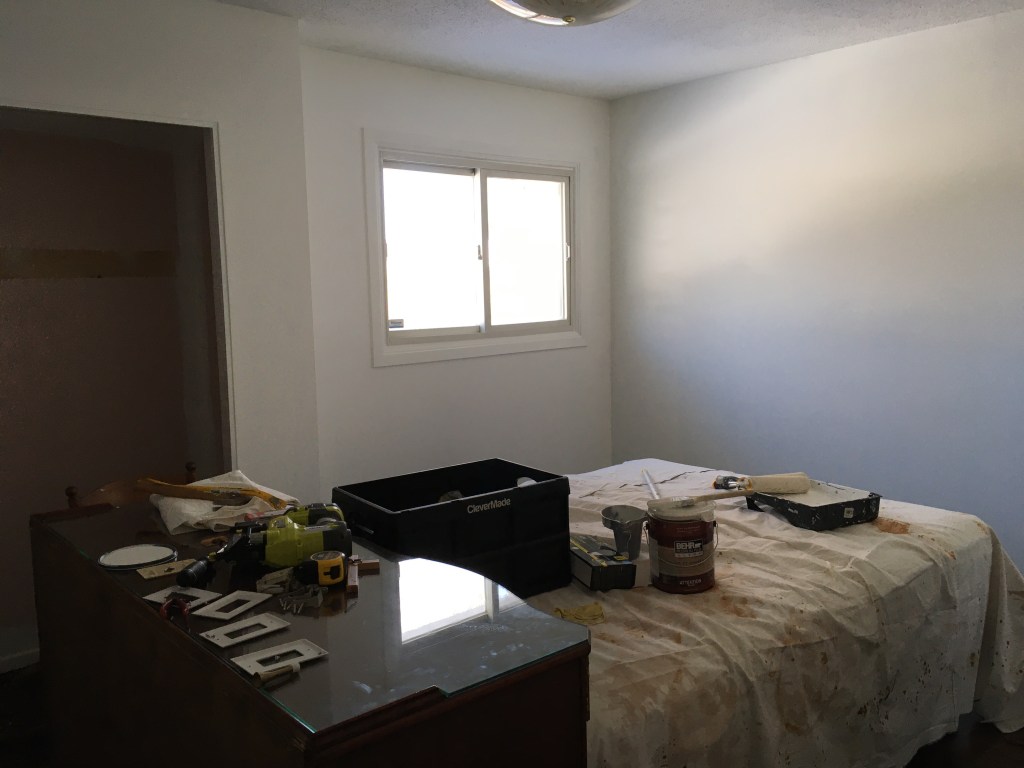
I didn’t do as much research as I should have about how to pick a white wall colour; I didn’t even buy sample pots which I should have done in hindsight. After putting one coat of Behr ‘Snowy Pine’ on the walls I felt like it was too cold. (Get it? Snowy Pine is too cold?) No, but really we then agreed to switch gears and warm it up a touch with Behr ‘Ivory Palace’ instead.
Grid Board and Batten
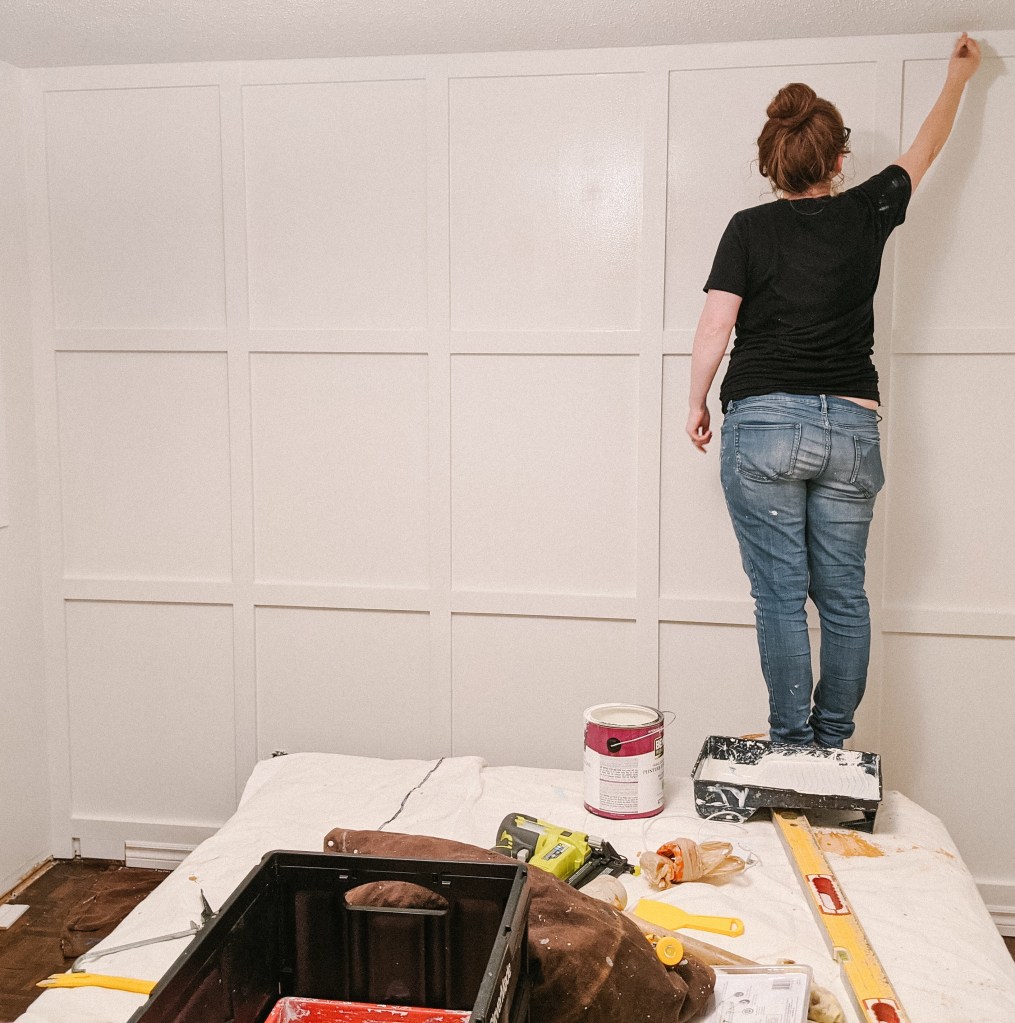
Since we decided against the green accent wall, I wanted to attempt something else to make that wall pop. I am so happy with how the grid pattern looks on the wall. If you want to do it yourself check out my easy to follow tutorial Simple and Affordable DIY Grid Pattern Board and Batten.
Closet
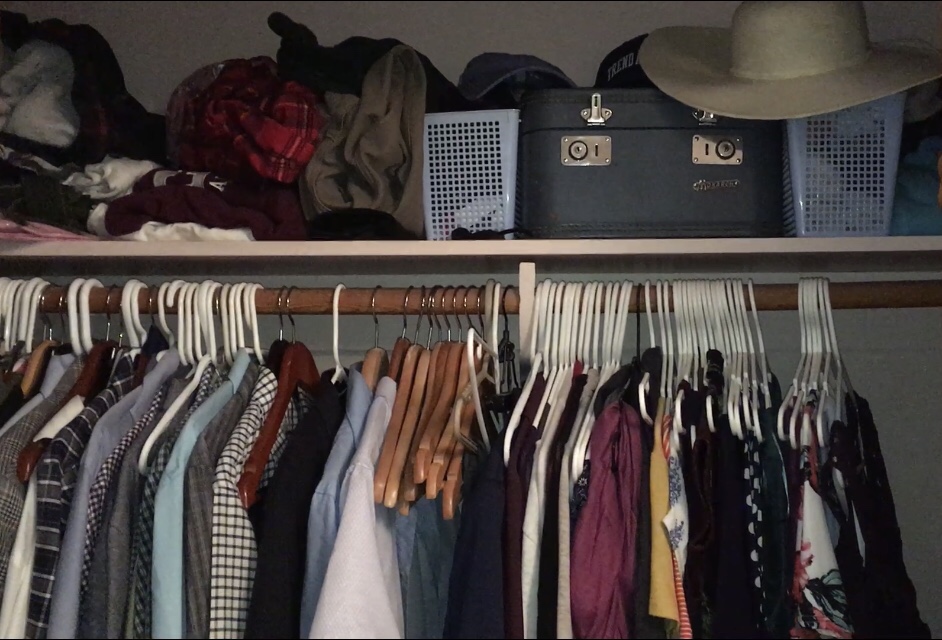
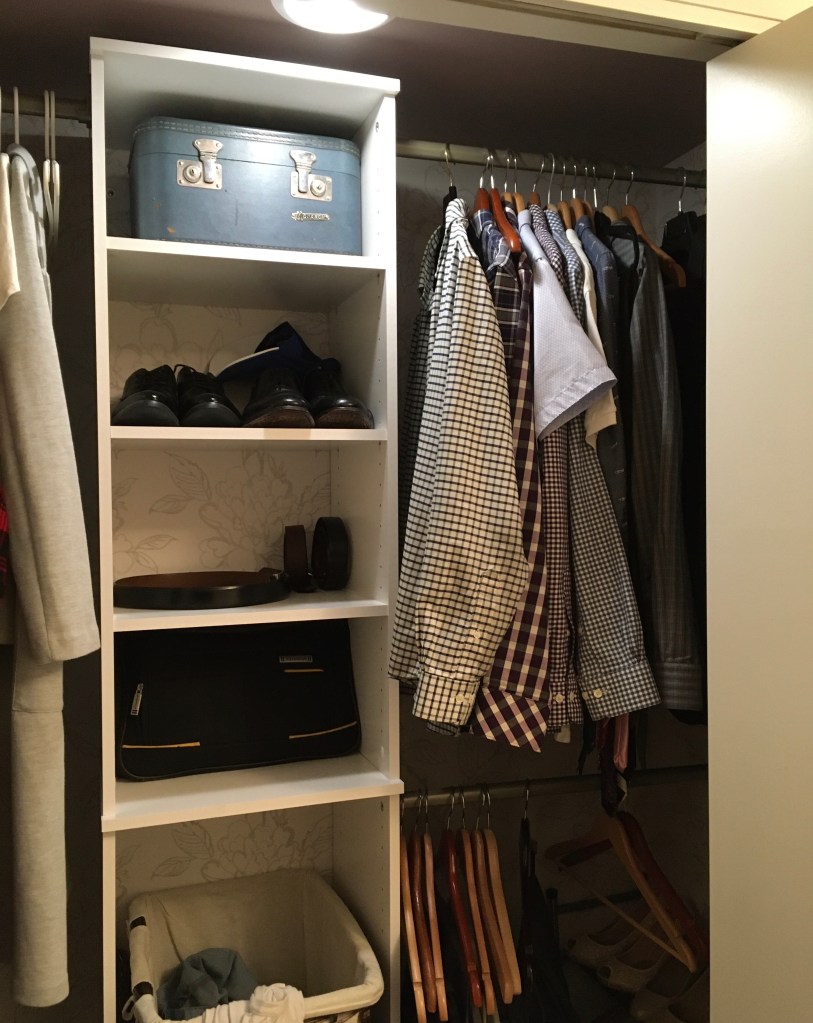
I knew the closet needed some work to make my vision come true. I attempted wallpapering for the first time in there. I figured not many people would see the inside of our closet so it wouldn’t matter if it wasn’t perfect. It turned out so beautifully that I almost didn’t want to cover it with the closet organizer and all of our clothes.

At least I still get to see the beautiful pattern when I decide what to wear. I highly recommend both the wallpaper and the closet organizer. Those are two of my 5 Affordable Ways to Improve Your Bedroom Closet.
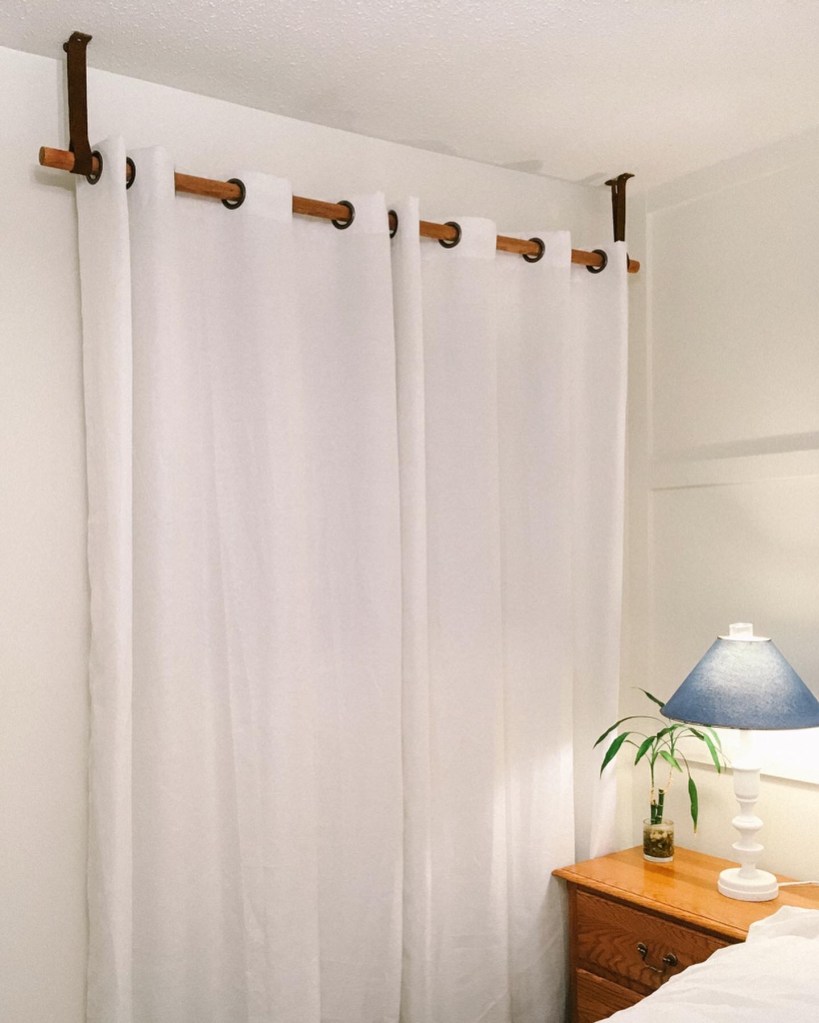
Curtain Rod
I didn’t like silver curtain rod we already had. It didn’t really go with the natural vibe I was going for. I knew I wanted to use the old wooden rod from the closet but didn’t have any brackets to mount it. So I had to get creative and thus my How To Hang a Curtain Rod Without Brackets tutorial was born.
Secondhand Items
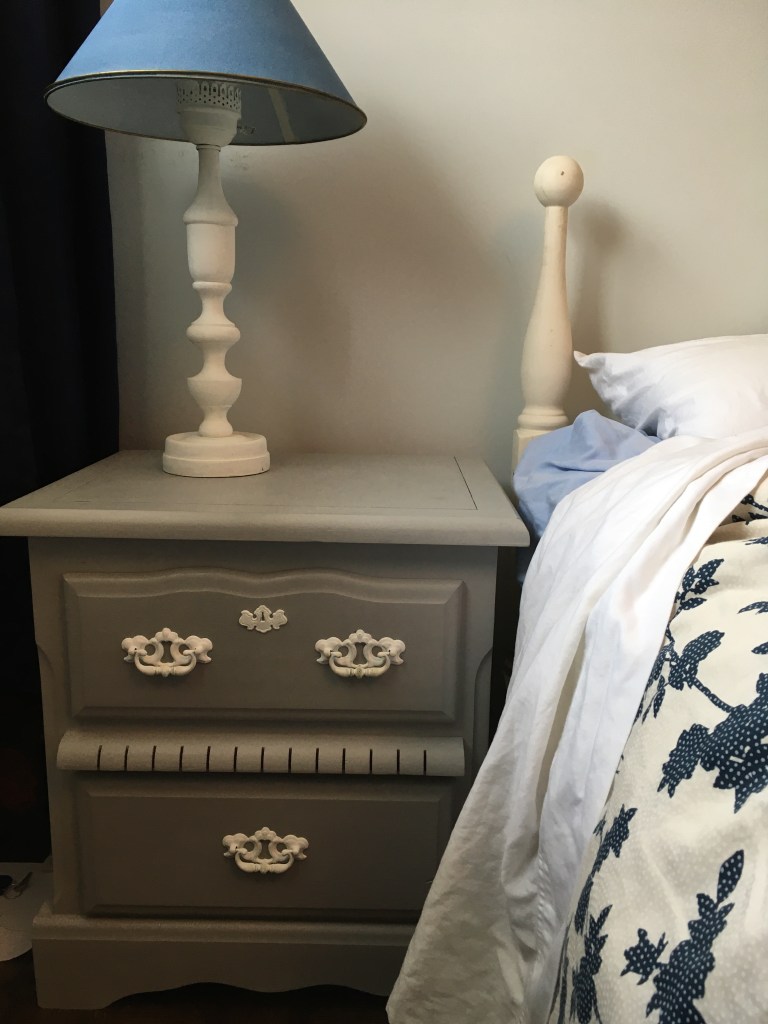
As previously mentioned, the new dresser and matching mirror are from my grandmother. She also gave us the new area rug.
I was able to thrift some side tables, new bedding, and curtains through Facebook Marketplace. I also traded a friend for a headboard but I didn’t like the look of it in the end. Hopefully I’ll be able to use it in another room in the house.
The Wish List
All of the above were things on my wish list for the room and I’m proud of how much I accomplished. The only items I wasn’t able to get to within the budget are new bedside lamps, a new lighting fixture, a honeycomb shelf and some artwork. I plan on coming back to all of these things eventually but since I reached the max budget it’s time to move on for now.
Budget breakdown
*All dollar amounts reflect Canadian prices
- Paint: $107
- Board and Batten: $108
- Wallpaper: $80
- Closet Organizer: $125
- Curtains: $10
- Bedding: $30
- Nightstands: $50
Total: $510
Budget Notes
- I didn’t include the price of supplies that we already had like nails, screws, spackle, and tools. We also borrowed painting supplies from my good friend (thanks again Shena!) to avoid having to buy everything ourselves.
- The price listed for the wallpaper includes the Graham and Brown paper and the wallpaper adhesive we had to buy.
- The price I put down for the Closet Maid closet organizer is lower than the listed price on Amazon because we bought one “Used/As Is” from the warehouse that was slightly damaged. Since it was going in the closet anyway we took the risk for the lower price and even though one corner is slightly damaged we just made sure to place that corner on the bottom at the back and you can’t even see it.
- We did end up going a bit over budget but if you consider that I sold our previous bedroom set (2 dressers and 2 nightstands) for $360 and sold a number of clothing items too (like a brand new never worn suit) for $100+, then this room refresh basically paid for itself!
Final Verdict
All in all I’d say this was a successful room refresh. I was able to tackle most of my wishlist and stay super close to the budget by using what I had, upcycling, thrifting and shopping the sales.
Most importantly, the room now feels bigger, brighter and is a relaxing space I am thrilled to retreat to when the day is done.
I’m encouraged by the success of this room and can’t wait to get started on the next one!

You’re welcome, again! 😀
Any time you need more painting done, my stuff is at your disposal.
LikeLike
Thanks Shena! You’re the best 😊
LikeLike
Love this room so much! You know how you said when you catch a glimpse of the room you feel the tension release from your shoulders? Just looking at these after photos has that effect on me!
LikeLike
Yes! It’s such a good feeling! Happy to share and spread the benefits of my room refresh. And it was all so doable once I focused on the one room. It amazes me how far we’ve come in so little time.
LikeLike